Food for thought - setting up a food garden
- Mar 31, 2024
- 4 min read
A major motivation for living as I do is to grow as much of my own food as I can manage.
A garden shed is a must
Getting started on a garden, however, took some planning over many months. First a garden shed was a necessity. After some research online and in hardware stores, I decided on medium-sized one (2.3m x 1.5m wide). It came as a flat pack, so I hired Dennis, a local handyman, to build it for me. Unfortunately, Dennis chose to assemble it in atrocious weather, with heavy rain and high winds adding a high degree of difficulty to the construction. After much wrestling with the panels in the wind, the shed was safely erected.

The shed has a wooden floor to which the thin metal sheets are attached. However, in my windy location, there is no guarantee of the shed remaining in its position, so extra pegs have been sunk into the ground to which the shed floor has been firmly bolted. So far the shed has withstood all that Mother Nature has chosen to hurl at the structure.
The shed obviously houses my gardening equipment, tools and leftover paint. But with space at a premium inside the tiny house, I am storing the bottle stock for my business, as well as my bike, camping and outdoor gear.
Building shelving to use the space efficiently is beyond my DIY skills, so instead I repurposed some old bookshelves I was planning to give away. They fit perfectly inside.
Composting food scraps
I already had a Bokashi system that was well matured and was waiting to be used in a garden. However, I love worm farms – the idea that my waste is being consumed by these small creatures. They are special kind of worm, called tiger worms, and are quite tiny compared to earthworms.
I bought an off-the-shelf worm farm that has two chambers for the worms: one in use for compost, and the other resting for later. Below the chambers is the liquid catchment for worm juice, or worm excrement. A tap allows this liquid to be collected easily, while the whole unit stands on legs allowing a bucket to be placed under the tap.
The worms came separately in a posted package. It took a few weeks for them to settle into their new home before they multiplied. Now when I empty my compost I see dozens of tiger worms crawling on and through the decaying vegetable matter. What a delight to see them working away at breaking down the compost.

There is a big disadvantage of worm farms, however. They don’t eat all types of foods – citrus and onions, in particular. This is where my existing Bokashi bin is still useful.
Now the job of creating the garden
The most important step was now to create garden beds. This was a task that challenged me to find a solution, as I have no building skills. My helpful landowner suggested a very robust design comprising zincalume sides held within a strong wooden frame. However, the price of materials was too high, and I would still need to pay for labour to build it.


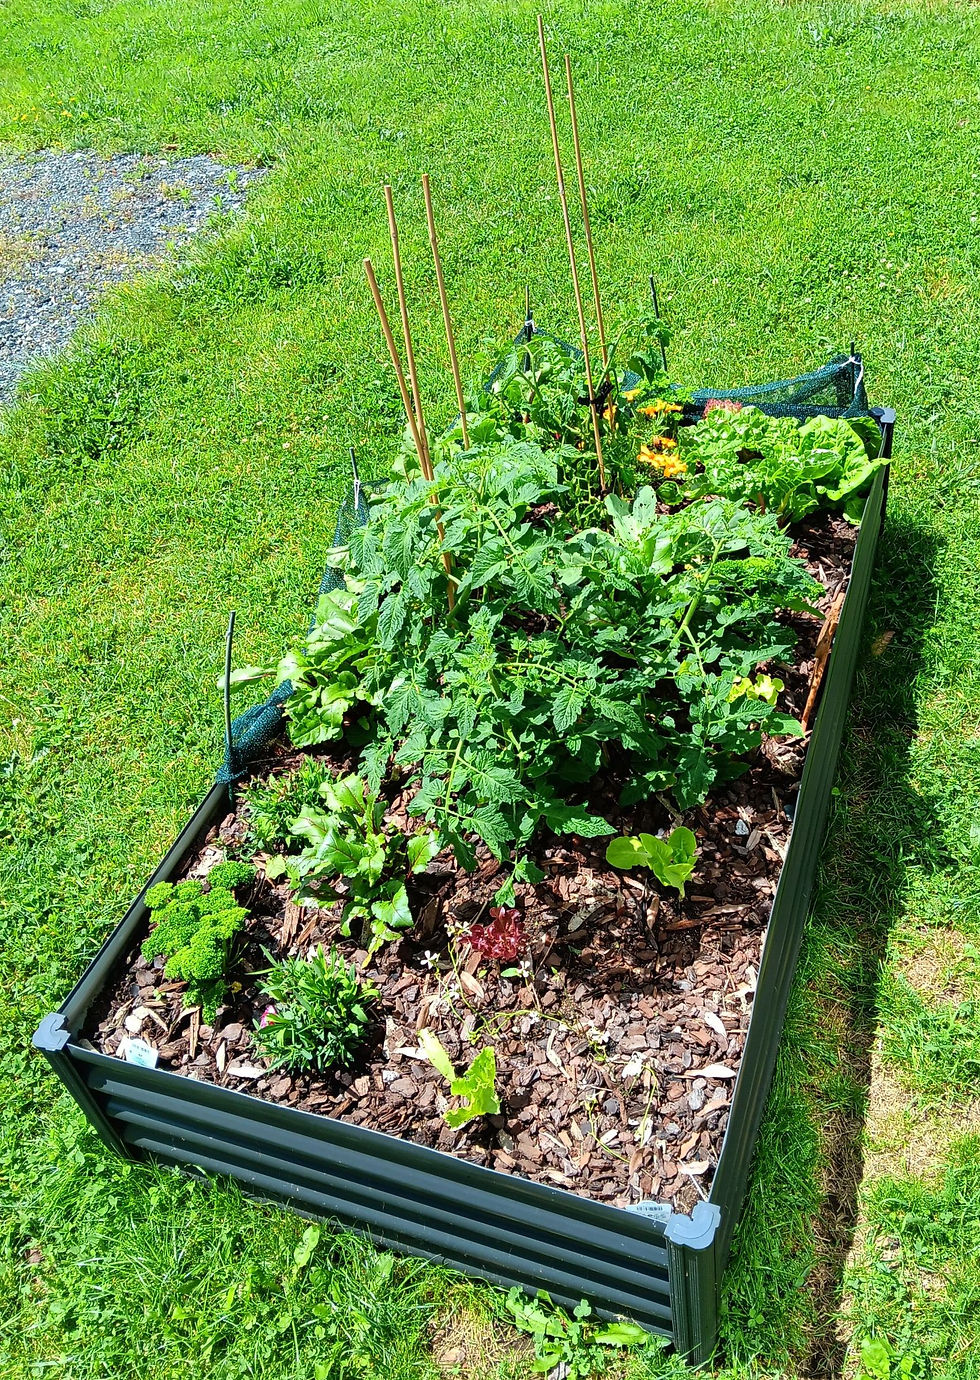
Instead, following a photo posted by a contact on WhatsApp, I found there are lots of stylish off-the-shelf garden bed models. After some research I decided on two 1 x 2 metre beds of zincalume for under $400. With their snaplock design they proved as easy to build as the instructions suggested. I placed the two beds either side of the new main deck where they will receive sun for most of the day.
When it came time to fill them with soil my generous landowner came to rescue. The base mix contains aged cow manure, with a smaller layer of top soil to complete. Finally, my garden was ready for summer planting.
The exciting part - the planting
I waited till the weather was a little warmer in the late Spring before sourcing the organic seedlings for my garden.

Initially, I planted two varieties each of tomatoes, cucumbers and beans; snow peas; a selection of lettuce varieties; silver beet; beetroot; a multi-coloured selection of carrots; cabbage and pumpkin.


I added herbs, planting some in pots as space was becoming tight: parsley, dill, coriander, chives, mint and rosemary.

I love adding flowering plants to salads, so marigolds and dianthus completed the initial planting.
Unfortunately, the Spring weather was wild with strong winds, and my garden is not sheltered. I lost the original bean plants and replanted new seedlings twice! The pumpkin also died and the cabbage was eaten by bugs before I protected it. I then replaced the pumpkin with scallopini – a relative of zucchini. My landowners also gave me five cherry tomato plants, which I squeezed in across both beds.

When, finally, the plants matured my garden started really flourishing. I have been able to supply most of my salad needs, as well as a number of key vegetables. And the harvest has been so good, I can share produce in my neighbourhood. More than just the food itself, though, my garden brings me enormous joy.


Comments